How to Grip a Pistol and Master Recoil
 Bryan Hill / January 20 2024
Do you want to control
recoil?
Do you want to
shoot quickly and accurately?
Here's how.
On This Page:
- Two-Handed Grip on a Pistol
- One-Handed Grip on a Pistol
- Testing Your Grip
- Building Your Grip Strength
- The Path to Better Pistol Shooting
- References
Two-Handed Grip on a Pistol
Definitions
Shooting hand: The hand that pulls the trigger on the pistol.
Support hand: The other hand.
Principles
No matter the size & strength of your hands or the gun you use, your grip needs to be:
-
Consistent: It's the same every time you pick up the gun, draw it from a holster, etc.
-
Durable: It holds together just as well on 2 shots as it does on 20.
-
Predictable: The gun returns from recoil the same way every shot.
Most people get hung up on the first half of recoil, when the gun flips up and the slide goes back.
Instead of fighting it, think of it as a test of your grip durability.
Let recoil happen and focus on keeping your grip together.
When your grip stays constant, all that matters is the second half of recoil.
This is when the slide returns.
When your grip is constant and returns the gun the same way every time, you'll be amazed at how easy it is to get the gun back on target.
Basics
Before getting into technique, we need to cover how you use your hands when you pick up the gun.
-
Shooting hand: Get the web between your thumb and index finger is as high on the grip as possible. No gaps!
-
Support hand: Put your index finger under the trigger guard.
Then roll the wrist forward 0-20º to get more of your hand on the grip.
The best angle is different for everyone and can depend on the gun.
It's a trade-off: the more you bend your wrist, the weaker your grip.
But the more contact your support hand has on the gun, the more it can manage recoil.
Below, you'll have tests with an unloaded gun to figure it out.
-
Elbows: Extend fully and then relax your upper arms.
That position is how far to extend when you present the gun.
-
Support hand: Bring in your fingers like a vise, from the joints closest to your knuckles.
Imagine you're trying to touch your palm with your fingertips. Flex your forearms.
-
Both hands: Leave your thumbs up and relax them.
-
Shooting hand: Set the right grip tension.
First test this out without a gun.
Keep your hand loose and see how fast you can move your index finger.
Then start gripping with your middle finger and see when your index finger starts to slow down.
You could set your whole firing hand tension to just before your index finger slows down.
Or, you can grip hard with just your pinky. If you relax your other fingers, this tends to set them to a good tension.
Test it out and find what gives a firm grip without slowing down your index finger.
-
Support hand: Grip so hard that your hand shakes, then back off the tension until the shake goes away.
You can try less tension in live fire, but your support hand will always grip harder than your shooting hand.
3-way Vise Grip
With the basics in place, we're going to make 3 vises on the gun:
-
Left-right vise
-
Forward-back vise
-
Up-down vise
Left-Right Vise
Without the left-right vise, your sights might be off left or right when moving the pistol (in the draw, hitting moving targets, etc.).
The sights can also return from recoil in an unpredictable way.
Both hands: Push the base of your thumbs together.
Turn or press your right hand left, and your left hand right.
You don't need a ton of pressure here.
Experiment to find the least you need to get results.
Forward-Back Vise
Without the forward-back vise, your sights might be off up or down when moving the pistol (in the draw, hitting moving targets, etc.).
The sights can also return from recoil in an unpredictable way.
Both hands: Pull in and up with the support hand, like your palm is trying to go toward your forehead.
Brace against the support hand with the shooting hand. Do both using only your wrists.
You should feel the upper forearm muscles in your support arm working hard.
Up-Down Vise
Without the up-down vice, your support hand will break off of the gun in recoil when shooting 9mm ammo.
To most people it will look like you're shooting 2-handed, but you'll be shooting 1-handed.
Support hand: Keep constant pressure up towards the trigger guard. It should come from the wrist.
Putting it All Together
Before you fire a shot and until you've finished shooting:
-
Follow the grip basics
-
Set the 3-way vise
Some people get lazy and milk the grip like a cow. Keep it firm all the way through your string of fire.
With more recoil you must grip harder.
You'll need more forward-back and up-down pressure with the 3-way vise to keep your grip constant.
Otherwise, your support hand will come loose. You may look like you're shooting 2-handed, but you're really shooting 1-handed.
A predictable grip has equal pressure on each part of the vise.
Your forward pressure equals your back pressure. Your up pressure equals your down pressure.
Unequal pressure on part of the vise causes the gun to return that way.
When you try to fight recoil and use too much forward and down pressure, your gun will return below your point of aim.
One-Handed Grip on a Pistol
What if you have to fire a pistol one-handed?
Grip with your shooting hand the way you would with a two-hand grip. Get it as high as possible.
Now bring in your thumb.
Why?
There's no need to make room for your support hand, and bringing in the thumb adds about 17% strength to your grip.
If your pistol has a manual safety, you can try resting your thumb on top of that instead.
Also try different thumb pressures. Start with pressing the base of your thumb toward your palm.
Make sure your thumb doesn't brush into the slide.
While maintaining that pressure, try pressing down into the thumb safety as well.
You may also find that turning the gun 30-45º, like above, is more comfortable and adds some recoil control.
That's fine for easy targets.
For any precision shots, keep the gun straight up or else your shots will go a bit off-target.
Grip the gun as hard as you can with your shooting hand.
Why? One-handed, the gains in recoil control outweigh any gains in trigger finger speed.
As with the two-hand grip, turn your elbow out.
Testing Your Grip
Recoil goes up and back. How do we verify our grip is effective?
1. Press Test
This simulates the "up" part of recoil and tests your grip Durability.
Time: A few minutes
What you need: An unloaded pistol and a sturdy surface
-
Find a sturdy surface. Below, we'll use a table. Throw a towel down if you'd like.
-
Unload your pistol. Put away any loaded magazines or ammo.
-
If your pistol has a light mounted, you may want to dismount it.
-
Use your firing grip on the pistol (one-hand or two-hand).
-
Rotate your arms down from the shoulders so the front of your pistol's frame contacts the table.
-
Keep rotating, so your pistol's frame presses against the table. Press hard.
-
Check your grip:
-
If your support hand comes loose, adjust it and try again until it stays firm under pressure.
-
If your wrists buckle, flex your forearms and try again.
-
If your support index finger breaks off of the trigger guard, apply upward pressure from that wrist.
-
Your grip is at a good starting point if your grip holds together and neither your wrists nor elbows buckle.
2. Racking Test
This simulates the "back" part of recoil.
Time: A few minutes
What you need: An unloaded pistol and a friend
-
Unload your pistol. Put away any loaded magazines or ammo.
-
Get your friend to come over and explain to them what this drill is.
-
Use your firing grip on the pistol (one-hand or two-hand).
-
Present your pistol in a safe direction.
-
Have your friend rack the slide on your pistol at least 6 times in a row.
-
If your support hand comes loose, adjust it and try again until it stays firm against the slide racking.
-
If your wrists buckle, flex your forearms and try again.
-
Find yourself tilting back? Put one foot at least a foot ahead of the other.
Lean forward and put your butt back so your shoulders are in front of your hips.
You pass the test if your grip holds together and neither your wrists nor elbows buckle.
3. Live Fire Test
Now is the real test.
Start each range session with this test until you get a proper grip every time, at least 10 times in a row.
Time: 1-2 hours (including driving to/from the range)
What you need: A pistol,
some range ammo, and an outdoor pistol range
-
At the range, load a magazine with 2 rounds.
-
At the firing line, load your pistol.
-
Aim at the berm, not any targets. Focus on your grip, not your sights.
-
Use your firing grip on the pistol (one-hand or two-hand).
-
Fire your pistol 2 times, as fast as you can.
-
Did your support hand come loose? If so, adjust its angle, position, or angle of pull, and try again until it stays firm on the gun.
-
If your wrists buckle, flex your forearms and try again.
-
Find yourself tilting back? Put one foot at least a foot ahead of the other.
Lean forward and put your butt back so your shoulders are in front of your hips.
Once your grip holds together and your wrists don't buckle, repeat with 3 rounds until you get it. Then repeat with 4, 5, and finally 6 rounds.
Once you can fire 6 shots in a row and keep a good grip, you have a durable grip.
It's easy to lose sense of what that is, so take notes about your grip:
-
How do your hands touch and press into each other?
-
Where is your support hand's index finger?
-
Where is each joint in that finger?
-
How about your support hand's thumb?
-
Your shooting hand's thumb?
-
Are there any parts of the pistol they touch? How are they touching?
The most durable grip won't help you if you can't produce it on demand.
Use anything you can to make your grip more consistent and help you remember what "right" is for you and your pistol.
Some people use a marker to draw a line from one hand to the other, across where they connect.
Then you can see the exact point and angle of how they come together.
It's different for everyone because we all have differently sized hands.
Once you're dialed in for a given pistol, you don't have to change your grip until you change pistols.
This is just the beginning of grip technique.
You still have to learn to track the sights on recoil and verify your pistol returns to the same spot every time.
Building Your Grip Strength
-
Top shooters have a grip strength of 120-140 lbs.
-
The average untrained male has a grip of 80-120 lbs.
-
The average untrained female has a grip of 60-80 lbs.
Do you need to build grip strength? Yes, if:
-
You don't have enough grip to do hanging exercises (that build your grip and the rest of your body at the same time).
-
You've tried everything else and still have grip or trigger issues with a pistol.
If you need more grip strength, here are a few ways to do it.
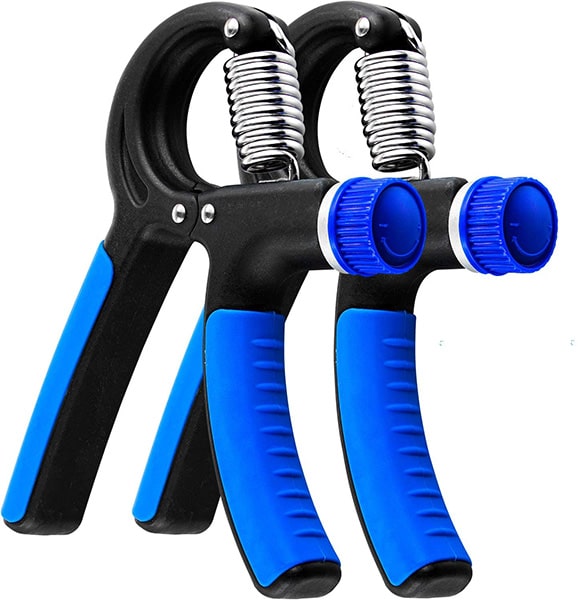
Your Grip Is under 90 Lbs.
These basic grippers ($10-12) are portable and convenient .
They're adjustable, and go from 22-132 lbs.
-
Start with 3 sets of 6 at 75% of your max. If you're unsure, set a weight where you max out at 8-10 reps.
(Yes, you're going to start with sets of 6 even though you could do 8-10 max. Going to your max all the time will cause injuries.)
-
Rest 2 min. between sets.
-
Do 3 workouts per week, or 2 times if you work with your hands.
-
Doing less than 15 reps per set? Add 1 rep per workout.
At 15 reps, Increase weight by 5 lbs., drop reps down to 6, and repeat the process.
Say you start with your grippers at 50 lb:
-
In week 1, you do 3 sets of 6, then 3 sets of 7, then 3 sets of 8.
-
Week 2, you do 3 sets of 9, then 3 sets of 10, and then 3 sets of 11.
-
Week 3, you do 3 sets of 12, then 3 sets of 13, and then 3 sets of 14.
-
Week 4, you do 3 sets of 15, then increase the weight to 55 lb., then do 3 sets of 6, and finally 3 sets of 7.
-
Weeks 5 and onward, you just keep repeating that process.
This is a slower progression (gain around 5 lbs of grip per month), but it's a safer one.
Once you can do 60-65 lbs. for 15 reps, your grip strength is around 90 lbs.
Your Grip Is 90 Lbs. or More
At this point, dry practice 3-5 days a week with a proper grip is probably all the grip-specific training you need.
Still, here are some great exercises that also build grip strength:
-
Towel Pullups / chinups (works biceps, lats, mid/lower trapezius, rear delts, and grip)
-
Towel Hanging knee or leg raises (works core and grip)
-
Deadlifts (works hamstrings, glutes, entire back, and grip)
-
Dumbbell Bulgarian split squats (works quads, hamstrings, glutes, calves, core, and grip)
-
Dumbbell reverse lunges (works hamstrings, glutes, core, and grip)
Preventing Injuries
Injuries will halt your progress. They can derail your training. How do we avoid that?
Too Much Intensity Too Fast
For any exercise, add no more than 3% intensity per week.
This may seem impossible: If you go from lifting 10 lbs to 15 lbs, that's 50% more weight!
When you can't increase the weight by 3%, what do you do?
It can be better to add reps to your sets before increasing weight.
Instead of going to 15 lbs, you could stay at 10 lbs. and add more reps.
So
You have to work harder the longer a set goes on.
If you did sets of 10 with 10 lbs in week 1, then you could do sets of 6 with 15 lbs in week 2.
You added weight, but made the set end when you'd feel about the same amount of effort as before.
Too Much Volume Too Fast
For any exercises, add no more than 5-10% volume per week.
So if you worked your grip for 100 seconds in week 1, 105 seconds would be good for week 2.
If you do more than 110 seconds in week 2, you're playing with fire.
Let's say you're using weights. You do 3 sets of 10 for 10 lbs in week 1.
That's 300 lbs of volume. You can add 15-30 lbs of volume in week 2. So you could do:
-
3 sets of 11 for 10 lbs. That's 330 lbs of volume.
-
3 sets of 7 for 15 lbs. That's 315 lbs of volume.
-
Some other combination that gets you 315-330 lbs of volume.
Muscle Imbalances
Muscle imbalances cause injuries. To prevent or treat tennis elbow (or shooter's elbow), here are a some exercises:
Forearm Strengthening
Need some dumbbells? The best deals will be on Craigslist, Facebook Marketplace, etc. for a used set.
Otherwise, get a set from your local sporting goods store, Walmart, etc.
Buying dumbell sets online (like from Amazon) can be 3-5x more expensive due to shipping costs.
For something more portable,
try resistance bands ($20 for a set).
You'll have to wrap one side of the band under your foot and the other side in your hand to do the exercises.
Here's a guide with pictures (PDF).
Finger Strengthening
Use these bands:
-
Rubber bands used on broccoli, asparagus, etc. at a grocery store
-
No. 89 rubber bands from an office supply store
Either way, sneak some sets in during downtime with these bands to strengthen the backs of your hands. It'll prevent injuries.
The Path to Better Pistol Shooting
Top shooters can recover from recoil and fire another accurate shot in 0.20 seconds or less.
That's 5 (or more) shots per second!
How do you get there? Work on your grip technique, dry practice, and get training.
Dry practice is a secret shared by all top military, police, and competition shooters.
It's effective, convenient, and free. Learn how to dry practice in this guide.
Start Leveling up with Dry Practice
Related Articles
Feedback
Are you happy with this page?
References
-
Guest Series | Dr. Andy Galpin: Optimize Your Training Program for Fitness & Longevity (2023)
-
Body Anatomy: Upper Extremity Muscles | The Hand Society (2022)
-
TGL EP 80 - Natural Firing Hand Position with Professor Kim (2022)
-
The effects of isometric hand grip force on wrist kinematics and forearm muscle activity during radial and ulnar wrist joint perturbations (2022)
-
Selective activation of Forearm muscles for improving Wrist Joint Stability (2021)
-
TGL EP 10 - Techniques for Gripping a Handgun (2021)
-
Effect of static wrist position on grip strength (2019)
-
How to Do Towel Pull-ups - Build Bigger Forearms & Stronger Grip (2018)
-
Wrist Strengthening Exercises (2017)
-
THE INFLUENCE OF FOREARM AND WRIST ORIENTATION ON STATIC GRIP
STRENGTH AS A DESIGN CRITERION FOR HAND TOOLS (2016)
-
Finger Strengthening with Band - Ask Doctor Jo (2016)
-
Comparison of grip strength among 6 grip methods (2014)
-
Physical Therapy Treatment for Shooter's Elbow (2014)
-
Shooter’s Elbow (aka Tennis Elbow / Golfer’s Elbow) (2014)
-
Factors affecting grip force: Anatomy, mechanics, and referent configurations (2016)
-
towel hang leg raises + 6kg (2016)
-
Hand Grip Strength: age and gender stratified normative data in a population-based study (2011)
-
Practical Demonstrations of Ergonomic Principles (2011)
-
WRIST POSITION AFFECTS HAND-GRIP STRENGTH IN TENNIS PLAYERS (2009)
-
The relationship between wrist position, grasp size, and grip strength (1992)